OnlyFans Age Verification: Complete Guide to Getting Verified in 2026
You be hot. We do the rest.
Scripts, filming, editing, fans, DMs — all handled. You show up a few hours a week. We turn that into $10K+ weekly.
Start Earning Now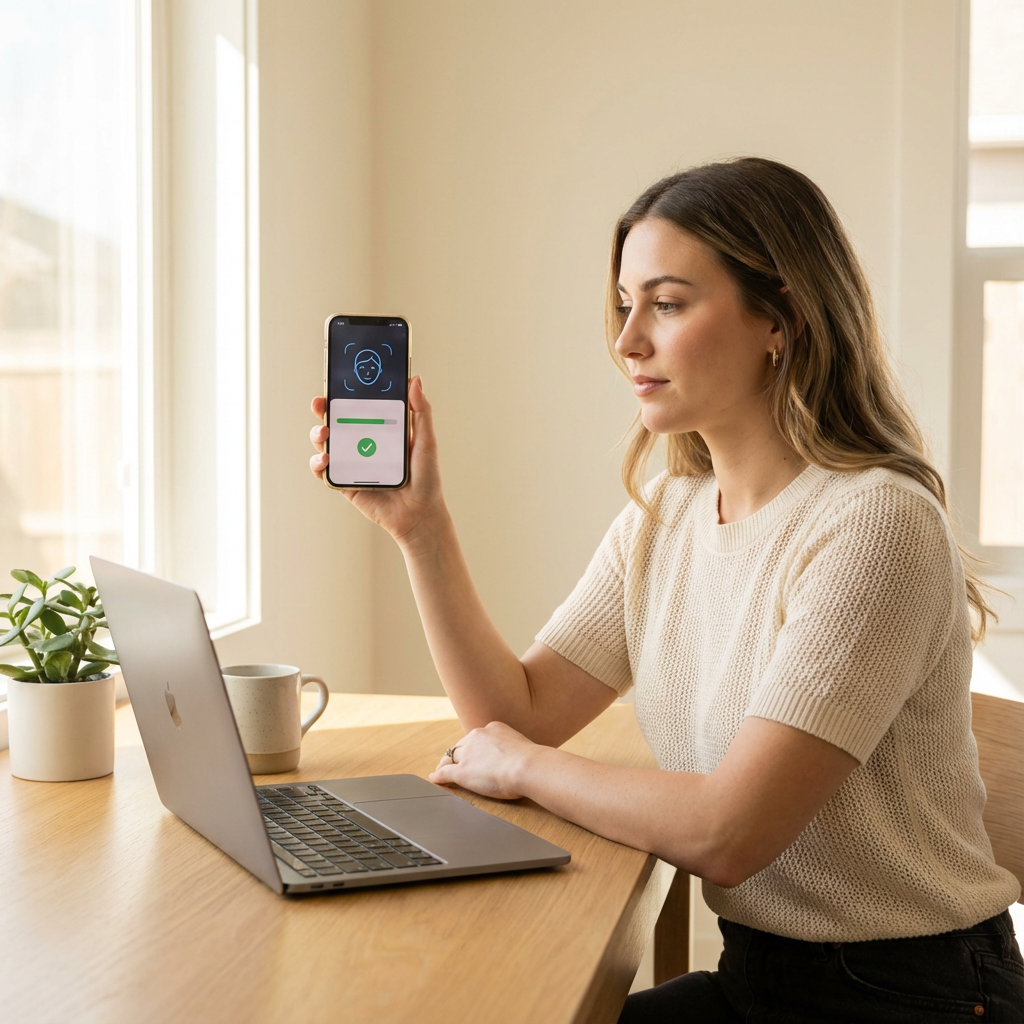 Understanding the verification process is your first step to becoming a successful creator
The age verification process is the biggest hurdle between you and your OnlyFans creator career—and it’s where most beginners get stuck. Whether you’re confused about what documents you need, worried about your privacy, or frustrated because your verification keeps getting rejected, you’re not alone. Thousands of aspiring creators face these exact same challenges every day.
The good news? Once you understand exactly how the process works, what OnlyFans is looking for, and how to avoid common mistakes, getting verified becomes straightforward. Most creators who follow the right steps get approved within 24-48 hours. Some even get verified the same day.
In this comprehensive guide, we’ll walk you through everything you need to know about OnlyFans age verification—from the basic requirements to advanced tips for speeding up approval, protecting your identity, and troubleshooting rejected applications. By the end, you’ll have all the knowledge you need to get verified quickly and start your creator journey.
📖 In This Guide: Complete verification requirements, step-by-step application process, photo tips for fast approval, common rejection reasons and fixes, privacy protection strategies, and how Lurely helps creators navigate verification smoothly.
Why OnlyFans Requires Age Verification
Before diving into the how, let’s understand the why. OnlyFans has strict age verification for important legal and ethical reasons that protect both creators and the platform.
Legal Requirements
OnlyFans operates in dozens of countries, each with their own laws regarding adult content. To comply with these regulations, OnlyFans must verify that:
- All creators are 18 or older - This is non-negotiable and legally required
- Identity documents are authentic - Prevents fraud and identity theft
- The person creating content is who they claim to be - Protects against impersonation
| Regulation | Requirement | OnlyFans Compliance |
|---|---|---|
| US 18 USC 2257 | Age verification for adult content | Full ID verification |
| UK Online Safety | Age assurance for adult platforms | Document + selfie verification |
| EU Digital Services Act | Identity verification for content creators | Multi-step verification |
| Payment Processor Rules | KYC (Know Your Customer) | Bank-grade identity checks |
⚠️ Important: Age verification isn’t optional or something OnlyFans does to be difficult. It’s legally required, and platforms that don’t properly verify ages face massive fines, criminal liability, and being shut down entirely.
Protecting Creators and Subscribers
Beyond legal compliance, verification protects everyone in the OnlyFans ecosystem:
For Creators:
- Ensures only legitimate adults can monetize content
- Reduces account theft and impersonation
- Creates accountability for content ownership
- Enables secure payment processing
For Subscribers:
- Confirms they’re interacting with real, verified adults
- Reduces scam accounts and catfishing
- Ensures payment goes to legitimate creators
- Builds trust in the platform
For OnlyFans:
- Legal compliance across jurisdictions
- Reduced fraud and chargebacks
- Platform credibility and longevity
- Partnership eligibility with payment processors
💡 Pro Tip: Think of verification as your professional credential. Just like any job requires identity verification, content creation on OnlyFans requires proving who you are. It’s a one-time process that protects your future earnings.
What Documents You Need for Verification
OnlyFans accepts several types of government-issued identification. Understanding exactly what’s accepted—and what’s not—saves time and frustration.
Accepted ID Documents
OnlyFans accepts the following government-issued identification:
Primary Documents (Most Reliable):
| Document Type | Requirements | Approval Speed |
|---|---|---|
| Passport | Valid, not expired, clear photo | Fastest |
| National ID Card | Government-issued with photo | Fast |
| Driver’s License | Valid, not expired, front and back | Fast |
| Residence Permit | With photo, government-issued | Moderate |
Document Requirements:
- Must be government-issued (not student IDs, work badges, etc.)
- Must include your photo
- Must show your full legal name
- Must display your date of birth
- Must be valid (not expired)
- Must be in original form (not photocopied)
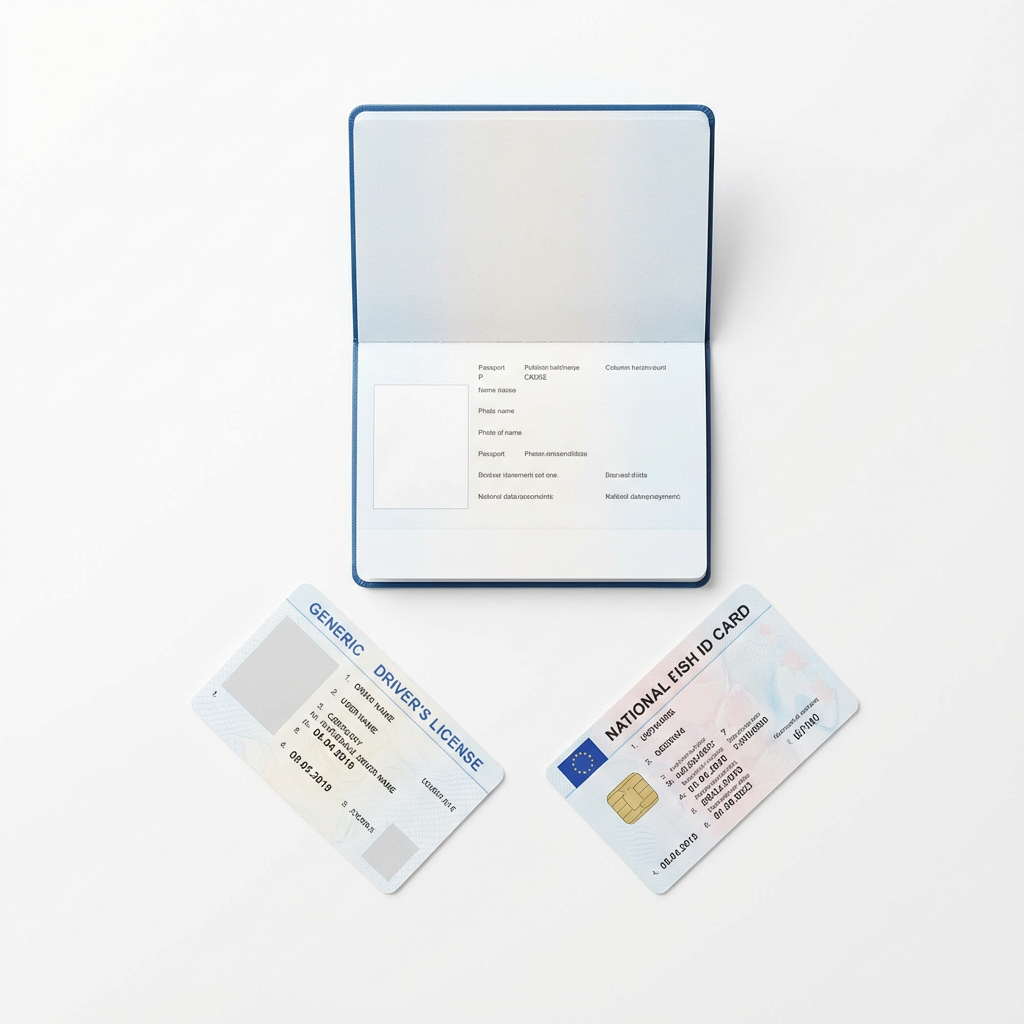 Acceptable ID documents for OnlyFans verification
What’s NOT Accepted
The following documents will be rejected:
- ❌ Expired documents of any type
- ❌ Student ID cards
- ❌ Work or employee badges
- ❌ Library cards
- ❌ Gym membership cards
- ❌ Health insurance cards (in most countries)
- ❌ Birth certificates (no photo)
- ❌ Social security cards (no photo)
- ❌ Photocopies or screenshots of documents
- ❌ Documents with covers or holders obscuring information
✅ Key Takeaway: When in doubt, use your passport. It’s the most universally accepted document and typically gets approved fastest because it’s standardized internationally.
Additional Requirements
Beyond your ID, you’ll also need:
A Clear Selfie:
- Must match the photo on your ID
- Well-lit, front-facing
- No filters, makeup effects, or heavy editing
- Your full face must be visible
- No sunglasses, masks, or obstructions
Bank Account or Payment Method:
- Account in your legal name
- Verified bank account for payouts
- Or alternative payment method (varies by country)
Valid Email Address:
- Used for account verification
- Must be accessible for confirmation codes
- Recommend creating a dedicated creator email
Phone Number:
- For two-factor authentication
- Must be able to receive SMS codes
- Can be the same as personal number
Step-by-Step Verification Process
Now let’s walk through the actual verification process. Following these steps exactly will maximize your chances of quick approval.
Step 1: Create Your OnlyFans Account
Before verification, you need a basic account:
- Go to OnlyFans.com
- Click “Sign Up”
- Enter your email address
- Create a strong password
- Verify your email via the confirmation link
- Complete basic profile setup
💡 Pro Tip: Use an email address you’ll have long-term access to. Many creators create a dedicated email like
yourname.creator@gmail.comfor all platform communications.
Step 2: Navigate to Creator Verification
Once logged in:
- Click on your profile icon
- Go to “Settings”
- Select “Add Bank” or “Become a Creator”
- You’ll be prompted to complete identity verification
Step 3: Enter Your Personal Information
You’ll need to provide:
- Legal full name (exactly as it appears on your ID)
- Date of birth (must be 18+)
- Country of residence
- Address (for tax purposes)
| Field | What to Enter | Common Mistakes |
|---|---|---|
| First Name | Exactly as on ID | Using nicknames |
| Last Name | Exactly as on ID | Missing middle names |
| Date of Birth | DD/MM/YYYY format | Wrong format |
| Address | Current residence | Old address |
⚠️ Warning: Your name must match your ID exactly. If your ID says “Katherine” don’t enter “Kate.” If it includes a middle name, include it. Mismatches cause rejections.
Step 4: Upload Your ID Document
This is the most critical step:
Photo Requirements:
- Take a new photo (don’t use old scans)
- Ensure all four corners are visible
- No glare or reflections
- All text must be readable
- Photo should be in focus
- Good lighting (natural light works best)
For Driver’s License/ID Cards:
- Upload front AND back
- Both sides must be equally clear
- Same lighting and quality for both
Technical Specs:
- File format: JPG, PNG, or PDF
- Minimum resolution: 1000 x 1000 pixels
- Maximum file size: 10MB
- Color photos only (no black and white)
 How to take the perfect ID photo for verification
Step 5: Take Your Verification Selfie
The selfie proves you’re the person on the ID:
Selfie Requirements:
- Face the camera directly
- Neutral expression (slight smile is fine)
- Both eyes open and visible
- Good, even lighting
- Plain background preferred
- No filters or editing
- Match your ID photo (same hair color, no dramatic changes)
What to Avoid:
- Heavy makeup that changes your appearance
- Sunglasses or regular glasses with heavy tint
- Hats or head coverings (unless religious)
- Holding your ID (unless specifically requested)
- Dramatic angle or poses
- Beauty filters or face-altering apps
💡 Pro Tip: Take your selfie in the same session as your ID photos. This ensures consistent lighting and makes matching easier for the verification team.
Step 6: Add Payment Information
To receive earnings, you’ll need:
Bank Account:
- Account holder name (must match your verified name)
- Bank name
- Account number
- Routing number (US) / Sort code (UK) / IBAN (EU)
- SWIFT/BIC code for international
Alternative Options:
- Some countries allow alternative payout methods
- Minimum payout thresholds vary by method
- Processing times differ by payment type
Step 7: Submit and Wait
After submitting:
- You’ll see a confirmation that your application is under review
- Check your email for any follow-up requests
- Don’t create a new application—wait for response
- Typical processing time: 24-72 hours
| Submission Quality | Expected Wait Time |
|---|---|
| Perfect documents | 24-48 hours |
| Minor issues | 48-72 hours |
| Requires resubmission | 3-5 days total |
| Complex cases | Up to 7 days |
Common Rejection Reasons (And How to Fix Them)
Understanding why applications get rejected helps you avoid these issues—or fix them quickly if they happen.
1. Name Mismatch
The Problem: The name on your ID doesn’t exactly match what you entered.
Common Causes:
- Using a nickname instead of legal name
- Missing middle name
- Spelling differences
- Married name vs maiden name
The Fix:
- Re-enter your name exactly as shown on your ID
- Include all names shown (first, middle, last)
- If your ID has accented characters, try both with and without accents
2. Blurry or Low-Quality Photos
The Problem: Verification team can’t read your document details.
Common Causes:
- Camera shake
- Poor lighting
- Low resolution camera
- Dirty camera lens
The Fix:
- Clean your camera lens
- Use natural daylight
- Hold your phone steady (use both hands)
- Take multiple photos and choose the best
- Ensure minimum 1000x1000 pixel resolution
3. Glare or Reflections
The Problem: Light reflecting off your ID makes text unreadable.
Common Causes:
- Direct overhead lighting
- Flash photography
- Laminated ID surfaces
- Taking photos near windows
The Fix:
- Turn off flash
- Use diffused natural light
- Angle your ID slightly (not flat)
- Move away from direct light sources
- Try taking photos in shade
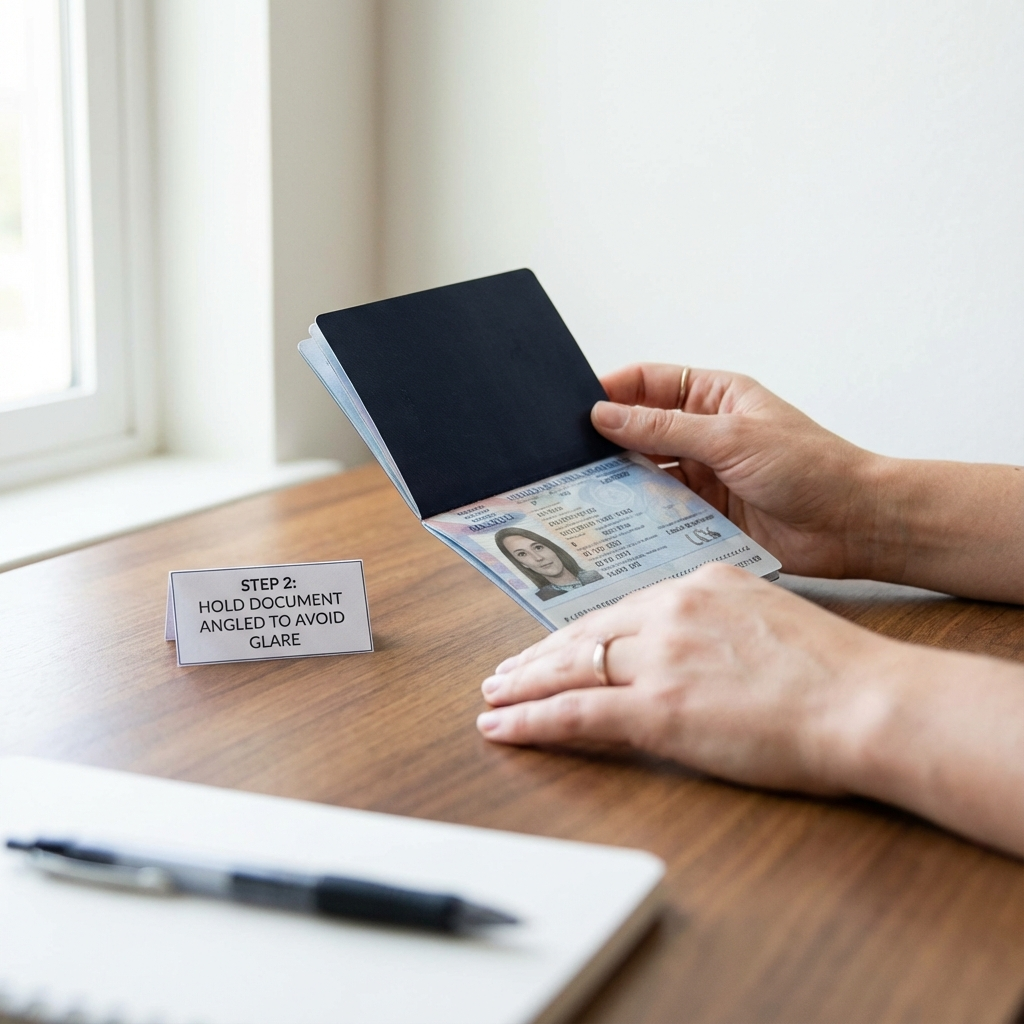
 Proper positioning to avoid glare on laminated IDs
4. Expired Document
The Problem: Your ID has passed its expiration date.
The Fix:
- Use a different, valid document
- Renew your expired document
- Check the expiration date before submitting
5. Selfie Doesn’t Match ID
The Problem: You look significantly different from your ID photo.
Common Causes:
- Major weight changes
- Different hair color/style
- Heavy makeup or filters
- Aging since ID photo
- Facial hair changes
The Fix:
- Remove heavy makeup
- Style hair similarly to ID photo
- Remove filters completely
- If ID is very old, consider using a newer document
6. Document Partially Visible
The Problem: Parts of your ID are cut off or obscured.
Common Causes:
- Cropping too tight
- Fingers covering corners
- Document in a holder/case
- Not photographing the full card
The Fix:
- Remove ID from any holders
- Show all four corners
- Leave margin around the document
- Ensure all edges are visible
7. Wrong Document Type
The Problem: You submitted a document OnlyFans doesn’t accept.
The Fix:
- Review the accepted documents list
- Use passport, national ID, or driver’s license
- Don’t use student IDs, work badges, or similar
✅ Key Takeaway: 90% of rejections are due to photo quality issues. Take your time, use good lighting, and review your photos before submitting.
How Long Does Verification Take?
Verification timeline varies based on several factors. Here’s what to expect:
Typical Processing Times
| Scenario | Expected Timeline |
|---|---|
| Perfect submission, standard hours | 24-48 hours |
| Weekend submission | 48-72 hours |
| Minor issues requiring review | 2-3 days |
| Resubmission needed | 3-5 days total |
| High volume periods | Up to 5 days |
| Complex verification cases | Up to 7 days |
Factors That Affect Speed
Faster Verification:
- Passport as primary document
- High-quality, clear photos
- Information matches exactly
- Submitted during business hours (UK time)
- Complete application with all fields
Slower Verification:
- Unusual document types
- International documents
- Name discrepancies
- Poor photo quality
- Incomplete applications
- Weekend/holiday submissions
What to Do While Waiting
- Don’t submit multiple applications (causes delays)
- Check your email regularly (including spam folder)
- Prepare your content strategy
- Set up your profile bio and settings
- Research your niche and competitors
- Plan your content calendar
💡 Pro Tip: Use the waiting period productively. By the time you’re verified, you can have your first week of content ready to post.
Privacy and Security During Verification
Many creators worry about privacy when submitting personal documents. Here’s how OnlyFans protects your information and additional steps you can take.
How OnlyFans Protects Your Data
Security Measures:
- Bank-level encryption for all data transmission
- Secure storage with access controls
- Compliance with GDPR and data protection laws
- Regular security audits
- Limited access to verification data
Data Usage:
- Used only for identity verification
- Not shared with third parties for marketing
- Not visible to subscribers or other creators
- Retained only as required by law
| Data Type | Who Can Access | Retention Period |
|---|---|---|
| ID Documents | Verification team only | As required by law |
| Selfie | Verification team only | Until account closure |
| Personal Info | OnlyFans operations | Duration of account |
| Bank Details | Payment processing only | Duration of account |
Additional Privacy Steps You Can Take
Before Verification:
- Create a dedicated email for OnlyFans
- Consider a stage name for your creator profile (different from verification name)
- Use a Google Voice or similar number if preferred
After Verification:
- Enable two-factor authentication immediately
- Use a strong, unique password
- Don’t share login credentials with anyone
- Monitor your account for suspicious activity
Long-term Privacy:
- Your real name stays private from subscribers
- You can use any display name for your profile
- Your location isn’t shared unless you reveal it
- Your ID documents aren’t accessible to anyone
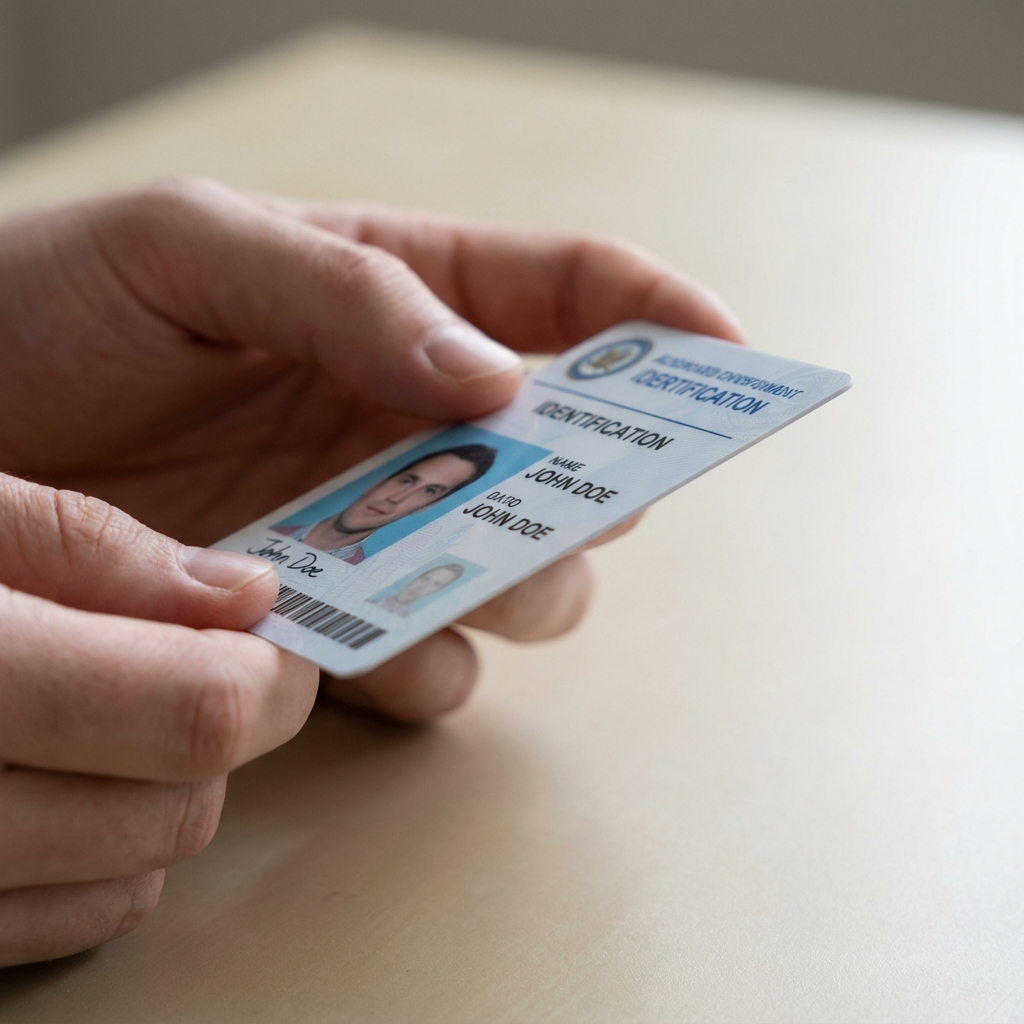
 Protecting your identity while building your creator career
✅ Key Takeaway: OnlyFans verification is similar to opening a bank account or applying for a job. Your personal information is necessary for legal compliance but remains confidential and isn’t shared with the public or your subscribers.
Special Cases and Situations
Some creators face unique verification challenges. Here’s guidance for special situations.
Name Changes
If your legal name has changed:
Married Name:
- Use your current legal name
- Submit ID with your current name
- If ID still has old name, use that name and update ID first
Legal Name Change:
- Must use name on current valid ID
- Consider updating ID before applying
- Previous names aren’t required
International Creators
OnlyFans accepts creators from most countries:
Document Translation:
- Documents in Latin alphabet: Generally accepted
- Documents in other scripts: May need additional verification
- Passport is usually best for international creators
Country-Specific Issues:
- Some countries have restricted banking
- VPN usage may cause verification issues
- Local payment methods vary by region
| Region | Common Document | Payment Options |
|---|---|---|
| North America | Driver’s license or passport | Direct bank, check |
| Europe | National ID or passport | SEPA bank transfer |
| UK | Passport or driving licence | UK bank transfer |
| Asia | Passport preferred | International wire |
| South America | Passport preferred | International wire |
Twins and Similar Appearances
If you have a twin or look very similar to a family member:
- Ensure your selfie matches YOUR ID specifically
- Additional verification may be required
- Don’t share accounts or documents with siblings
Previous Rejected Applications
If you’ve been rejected before:
- Read the rejection reason carefully
- Fix the specific issue mentioned
- Wait at least 24 hours before resubmitting
- Don’t create new accounts—use the same one
- Contact support if repeatedly rejected without clear reason
Speeding Up Your Verification
Want to get verified as fast as possible? Follow these pro tips:
Before You Apply
- Gather all documents in advance
- Ensure ID isn’t expired
- Clean your phone camera lens
- Find a well-lit location
- Have your bank details ready
- Create your verification email
During Application
- Enter name exactly as shown on ID
- Double-check date of birth format
- Take multiple photos, choose the best
- Review all photos before submitting
- Complete all required fields
- Submit during UK business hours (Mon-Fri)
Photo Checklist
| Photo Type | Quality Check | ✓ |
|---|---|---|
| ID Front | All corners visible, no glare | ☐ |
| ID Back | All text readable, clear | ☐ |
| Selfie | Face clearly visible, matches ID | ☐ |
| Lighting | Even, natural light | ☐ |
| Resolution | High quality, not pixelated | ☐ |
After Submission
- Don’t submit additional applications
- Check email (including spam) daily
- Respond to any requests within 24 hours
- Prepare content while waiting
- Set up profile details you can edit
💡 Pro Tip: Creators who submit perfect applications during UK business hours (Monday-Friday, 9am-5pm GMT) typically get verified within 24 hours.
What Happens After Verification?
Congratulations! Once verified, here’s what to expect:
Immediate Access
After approval, you can:
- Access full creator features
- Set your subscription price
- Enable pay-per-view content
- Start posting content
- Share your profile link
- Receive tips and messages
First Steps After Verification
-
Complete your profile
- Add a compelling bio
- Set your subscription price
- Upload a profile picture
- Add a banner image
-
Configure your settings
- Enable two-factor authentication
- Set notification preferences
- Configure payment settings
- Review privacy options
-
Post your first content
- Have 3-5 posts ready to publish
- Create a welcome message for new subscribers
- Consider a promotional price for launch
Building Your Creator Career
Verification is just the beginning. Successful creators also:
- Develop a consistent posting schedule
- Engage actively with subscribers
- Promote across multiple platforms
- Continuously improve content quality
- Track analytics and optimize strategy
How Lurely Simplifies the Process
While verification is straightforward once you understand it, many creators still find the process stressful—especially when rejections happen. That’s where working with an agency like Lurely makes a difference.
What Lurely Provides
Pre-Application Support:
- Document review before submission
- Guidance on photo quality
- Name and information verification
- Checklist review
During Verification:
- Direct communication with support
- Quick troubleshooting for issues
- Resubmission assistance if needed
- Status updates and timeline estimates
After Verification:
- Complete profile setup assistance
- Content strategy development
- Promotion and marketing support
- Ongoing account management
Why Creators Choose Lurely
| DIY Verification | With Lurely |
|---|---|
| Figure it out alone | Expert guidance |
| Trial and error | First-time approval |
| No support for issues | Direct assistance |
| Weeks of delay possible | Streamlined process |
| Post-verification confusion | Complete onboarding |
🎯 Ready to Start Your Creator Journey? Apply to Lurely and let our team guide you through verification and beyond. We’ve helped hundreds of creators get verified quickly and build successful OnlyFans careers.
Creator Success Story
Sofia, 23, from Romania:
“I tried to verify on my own three times and kept getting rejected. I didn’t understand why—my photos looked fine to me. When I joined Lurely, they reviewed my documents and immediately spotted the issue: glare on my ID that I couldn’t see on my phone screen. They helped me retake it properly, and I was verified within 24 hours. Now I’m earning €4,000/month and so glad I didn’t give up.”
Frequently Asked Questions
Can I verify with an expired ID?
No, OnlyFans requires valid, non-expired identification. If your only ID is expired, you’ll need to renew it before applying for verification. This is a legal requirement, not a platform preference.
Will my real name be visible to subscribers?
No. Your legal name is used only for verification and payment processing. You can choose any display name for your public profile. Subscribers will only see your chosen creator name, not your legal identity.
How long is my verification valid?
Once verified, your account remains verified as long as it stays active and in good standing. You won’t need to re-verify unless you close your account and create a new one, or if there are significant discrepancies discovered.
Can I use someone else’s ID to verify?
Absolutely not. Using someone else’s identity documents is fraud and illegal. OnlyFans uses facial recognition to match your selfie to your ID. Fraudulent applications are reported to authorities and result in permanent bans.
What if I don’t have a bank account in my name?
You’ll need a bank account in your verified legal name to receive payouts. If you don’t have one, you’ll need to open an account before completing verification. Some countries offer alternative payment methods, but bank accounts are most reliable.
Can I verify if I’m exactly 18?
Yes, as long as you’re 18 years old on the day you submit your verification application, you’re eligible. OnlyFans verifies your age from your date of birth on your ID document.
What happens if I’m rejected multiple times?
If you’re rejected multiple times, carefully review each rejection reason and ensure you’re addressing the specific issues mentioned. If problems persist, contact OnlyFans support directly. Don’t create new accounts—this can result in permanent bans.
Is my ID information stored securely?
Yes, OnlyFans uses bank-level encryption and security measures to protect all personal data. Your ID documents are only accessible to the verification team and are stored in compliance with international data protection regulations.
Conclusion: Your Path to Creator Success Starts Here
Age verification might seem like a bureaucratic hurdle, but it’s actually the foundation of your creator career. It’s what separates legitimate, professional creators from scammers and underage users. It’s what allows OnlyFans to process your payments legally. And it’s what gives subscribers confidence that they’re supporting real, verified adults.
The process itself is simple when you’re prepared:
- Gather the right documents
- Take high-quality photos
- Enter information exactly as it appears on your ID
- Submit during business hours
- Wait patiently (24-72 hours typically)
If you follow the guidelines in this guide, you’ll likely be verified on your first try. And if you want expert support to ensure everything goes smoothly, Lurely is here to help.
🚀 Ready to Begin? Don’t let verification anxiety hold you back from your creator dreams. Apply to Lurely today and join hundreds of creators who’ve successfully launched their OnlyFans careers with our support.
Related Articles:
Related Articles
How to Choose the Best OnlyFans Agency in 2026
Learn how to evaluate and choose the best OnlyFans agency. Compare fees, contracts, services, and red flags to find the perfect management partner for your creator career.
How to Get Your First 100 Subscribers on OnlyFans: Proven Strategies for 2026
Master the art of gaining your first 100 OnlyFans subscribers with proven strategies. Learn optimization, marketing, content planning, and how Lurely accelerates growth.
How Much Can You Really Earn on OnlyFans in 2026?
Discover real OnlyFans earnings data for 2026. Learn income tiers, what affects success, solo vs agency comparison, and how top creators earn $10k+ monthly.